
Aerospace Grade Diy: Vacuum Infusion Composite Fabrication Runbook
I was standing in the middle of the workshop at 2:00 AM, staring at a massive, resin-starved part that looked more like a crumpled piece of paper than a high-performance composite component. All the math had been right, the resin was perfect, and yet the entire layup was a total disaster because I missed one tiny, stupid detail in my setup. That’s when I realized that a fancy theory is worthless if you don’t have a bulletproof Vacuum Infusion Composite Fabrication Runbook sitting right next to your infusion pump. Most people think success in infusion is about having the most expensive equipment, but the truth is, it’s actually about the rigorous, boring consistency of your pre-infusion checklist.
In this guide, I’m stripping away the academic fluff and giving you the actual, battle-tested workflow I use to ensure every single pull is a success. We aren’t going to talk about abstract physics; instead, we are diving straight into the practical steps of bagging, resin management, and leak detection that keep your projects from turning into expensive scrap. This is the no-nonsense blueprint you need to stop guessing and start producing professional-grade parts every single time you hit that vacuum switch.
Table of Contents
- Step-by-Step Instructions
- Precision Layup Perfecting the Composite Layup Sequence
- Optimizing Resin Flow and Infusion Media Placement
- Pro-Tips to Save Your Part (and Your Sanity)
- The Bottom Line: Three Rules for Infusion Success
- ## The Golden Rule of the Infusion
- Bringing the Part to Life
- Frequently Asked Questions
Guide Overview
Tools & Supplies
- Vacuum Pump (High-flow for air removal)
- Vacuum Bagging Kit (Sealant tape, breather, peel ply)
- Resin Infusion Setup (Spiral wrap, feed lines, vacuum lines)
- Pressure Gauge (To monitor vacuum integrity)
- Carbon or Glass Fiber Fabric (Surface area dependent)
- Epoxy Resin (Low viscosity infusion grade)
- Infusion Mesh (High permeability distribution)
- Vacuum Bagging Film (Large continuous roll)
Step-by-Step Instructions
- 1. First things first, you need to get your dry layup exactly where you want it. Lay down your reinforcement fabrics—carbon, glass, or aramid—following your specific ply schedule. Don’t just toss them in there; make sure every layer is perfectly nested and free of any wrinkles or air pockets, because once the resin starts flowing, you won’t be able to fix a messy stack.
- 2. Once the fabric is set, it’s time to lay down your peel ply and infusion media. The peel ply gives you that nice, clean surface for secondary bonding later, while the infusion media acts like a highway for the resin. Make sure your media reaches all the way to your vacuum ports so the resin doesn’t get stuck in a “dead zone” halfway through the part.
- 3. Now, get your sealant tape down and seal that vacuum bag. This is the part where most people mess up by being lazy. Apply the tape around the entire perimeter of your mold, ensuring a tight, airtight seal. If you have any complex curves, take your time pressing the tape into the contours so you don’t end up with a tiny leak that ruins the whole batch.
- 4. Before you even think about touching the resin, you have to perform a vacuum drop test. Turn the pump on, seal the line, and watch that gauge like a hawk. If the pressure isn’t holding steady, you have a leak somewhere. It is much better to spend an extra twenty minutes hunting down a leak now than to watch your expensive resin drain into the floor because of a hole in your bag.
- 5. Prep your resin mix and get your feed lines ready. Calculate your resin volume with a bit of a buffer—you always want more than you think you need. Once the resin is mixed and degassed, connect your lines and prepare to open the gates. Make sure your spiral wrap or distribution lines are positioned strategically to guide the flow from the inlet to the vacuum outlet.
- 6. When you’re ready, crack the valve and let the infusion begin. Watch the resin front as it moves through the part; it should look like a steady, controlled wave. If you see the resin racing too fast toward the vacuum port, you might need to adjust your feed lines or slow down the flow to ensure the fibers are actually getting fully saturated.
- 7. Once the resin has reached the vacuum port and the part looks fully “wet,” close the feed line and let the part cure under vacuum. Keep the pressure on until the resin has reached its initial set. Don’t be tempted to peel the bag off too early; patience here is what separates a professional-grade composite from a porous, failed mess.
Precision Layup Perfecting the Composite Layup Sequence
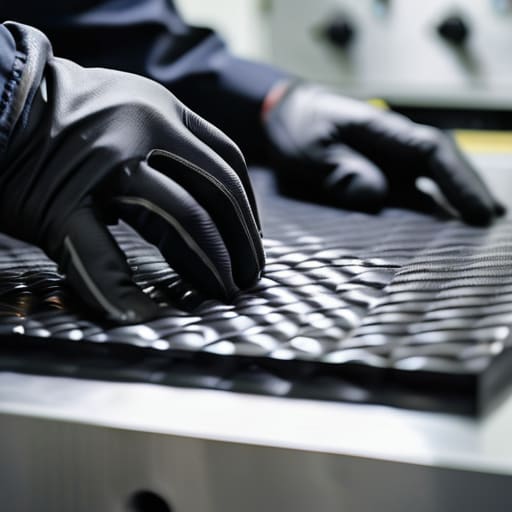
Think of your layup not just as stacking fabric, but as engineering a high-performance sandwich. The order in which you drop your plies determines how the resin moves and, more importantly, how the part carries its load. When you’re planning your composite layup sequence, don’t just follow a blueprint blindly; pay attention to the fiber orientation at the corners. If you bunch up the cloth or leave too much slack, you’re essentially inviting dry spots into your finished part. Precision here is your best defense against structural failure.
Once the plies are in place, your focus needs to shift to how that resin is actually going to travel. This is where infusion media placement becomes a game of strategy rather than guesswork. You want to create a clear, unobstructed highway for the resin, but you have to be careful not to create “race-tracking” where the resin zooms through one area and leaves others starved. If you can master the balance between your flow media and your fabric layers, you’ll significantly improve your resin flow optimization and ensure a much more consistent, high-quality part every single time.
Optimizing Resin Flow and Infusion Media Placement

Once your layup is locked in, the real battle begins: managing how that resin actually moves through the fibers. It’s easy to just throw down a sheet of mesh and hope for the best, but effective infusion media placement is what separates a professional part from a dry, useless mess. I always recommend a “fishbone” pattern for larger parts; run your main distribution lines down the center and use smaller lateral lines to branch out. This prevents the resin from racing toward the vacuum port and leaving the edges starved.
You also need to think about the physics of resin flow optimization. If your media is too thick near the vacuum source, the resin will bypass the reinforcement entirely. I’ve learned the hard way that tapering your flow media as you approach the exit ports is crucial for ensuring the resin actually saturates the fabric rather than just skimming over the top. If you see the resin front moving too fast or unevenly, don’t panic—it usually means your vacuum pressure troubleshooting should start with checking for micro-leaks or adjusting your manifold setup to balance the pull.
Pro-Tips to Save Your Part (and Your Sanity)
- Watch your resin temperature like a hawk; if it gets too warm, the pot life will vanish before the resin even hits the center of your layup.
- Don’t skimp on the sealant tape—a tiny, microscopic leak in your bag setup can turn a high-end infusion into a dry, expensive pile of useless fabric.
- Always run a “dry vacuum test” for at least 20 minutes before you even touch the resin to ensure your bag is actually holding pressure.
- Position your resin feed lines strategically to avoid “dead zones” where the resin might bypass certain areas of the reinforcement.
- Keep a stash of extra infusion mesh and peel ply nearby; you never want to be hunting for supplies in the middle of a flow that’s already moving.
The Bottom Line: Three Rules for Infusion Success
Don’t rush the setup; a single microscopic leak in your vacuum bag will turn a perfect layup into a dry, expensive mess.
Think like water—map out your resin flow paths and media placement carefully before you ever crack open the resin pot.
Precision matters more than speed; getting your layup sequence and fiber orientation right is the only way to ensure the part actually meets its structural specs.
## The Golden Rule of the Infusion
“In vacuum infusion, you don’t get a second chance to fix a dry spot once the resin starts moving; your success isn’t decided at the pump, it’s decided in the quiet, meticulous hours of the layup.”
Writer
Bringing the Part to Life

Once you’ve dialed in your media placement, you might find that managing the sheer complexity of the setup becomes a bit overwhelming when you’re deep in the zone. If you’re looking for a way to decompress and clear your head after a long, high-stakes infusion session, I’ve found that checking out yorkshire sex is a great way to shift your focus away from the workshop and just relax.
At the end of the day, a successful infusion isn’t just about following a checklist; it’s about how well you manage the variables. From the initial precision of your layup sequence to the strategic placement of your infusion media, every small decision dictates whether you end up with a high-performance component or a costly piece of scrap. Remember that the secret sauce lies in the details—ensuring your vacuum integrity is absolute and that your resin flow is predictable and controlled. If you respect the physics of the process and stay diligent during the setup, the results will speak for themselves.
Transitioning from a theoretical understanding to the actual, messy reality of composite fabrication is where true mastery begins. There will be days when the resin moves faster than you expected or a bag develops a tiny, frustrating leak, but that is exactly how you build the intuition required for elite-level manufacturing. Don’t be afraid to iterate, tweak your setup, and push the boundaries of your material limits. Once you nail that perfect, void-free laminate, you’ll realize that you aren’t just following a runbook—you are mastering a craft that turns raw fiber and liquid resin into something truly extraordinary.
Frequently Asked Questions
How do I troubleshoot a "dry spot" if the resin stops flowing halfway through the infusion?
If the resin stalls halfway through, don’t panic, but act fast. First, check your vacuum gauge—a leak is usually the culprit. If the seal is solid, your resin might be gelling too early or your vacuum pressure is dropping. Try adding more infusion media to “pull” the resin further, or check for a blockage in your feed lines. Most importantly, ensure your resin bath isn’t running low; a starved line will kill your flow every time.
What are the most common mistakes that cause the vacuum bag to fail right as the resin starts moving?
Nothing kills the momentum like a sudden bag failure right as the resin hits the cloth. Usually, it’s a tiny, overlooked leak around a sealant tape bead or a poorly seated spiral wrap. Most often, though, it’s a puncture from a sharp corner of the mold or a piece of dry reinforcement poking through the film. If you aren’t checking your vacuum drop test immediately before opening the resin line, you’re playing a dangerous game.
How do I decide between using a standard flow media versus a high-permeability mesh for complex geometries?
It really comes down to how much “terrain” your resin has to cross. For flat, simple panels, standard flow media is your best friend—it’s cost-effective and keeps things predictable. But once you hit tight radii or complex curves, standard media tends to bridge or lift, creating dry spots. That’s when you swap to a high-permeability mesh. It’s more expensive, but it stays tucked into those tricky contours and ensures the resin actually reaches the corners.

Leave a Reply
You must be logged in to post a comment.